Saturday, December 29, 2007

Holiday Planner


I made this holiday planner for my MIL, Shirley. She asked if I was trying to tell her she needed to be more organized (as if I, of all people, could suggest that!), but I really just thought she would like it. She's the kind of person who actually keeps all of her receipts in an envelope, and she writes out her holiday menus.

I got the idea from JanTInk here on her blog, and she originally got the idea from Blue Moon Stamping here. I've also seen ones that have been made into information for babysitters. The possibilities go on and on!

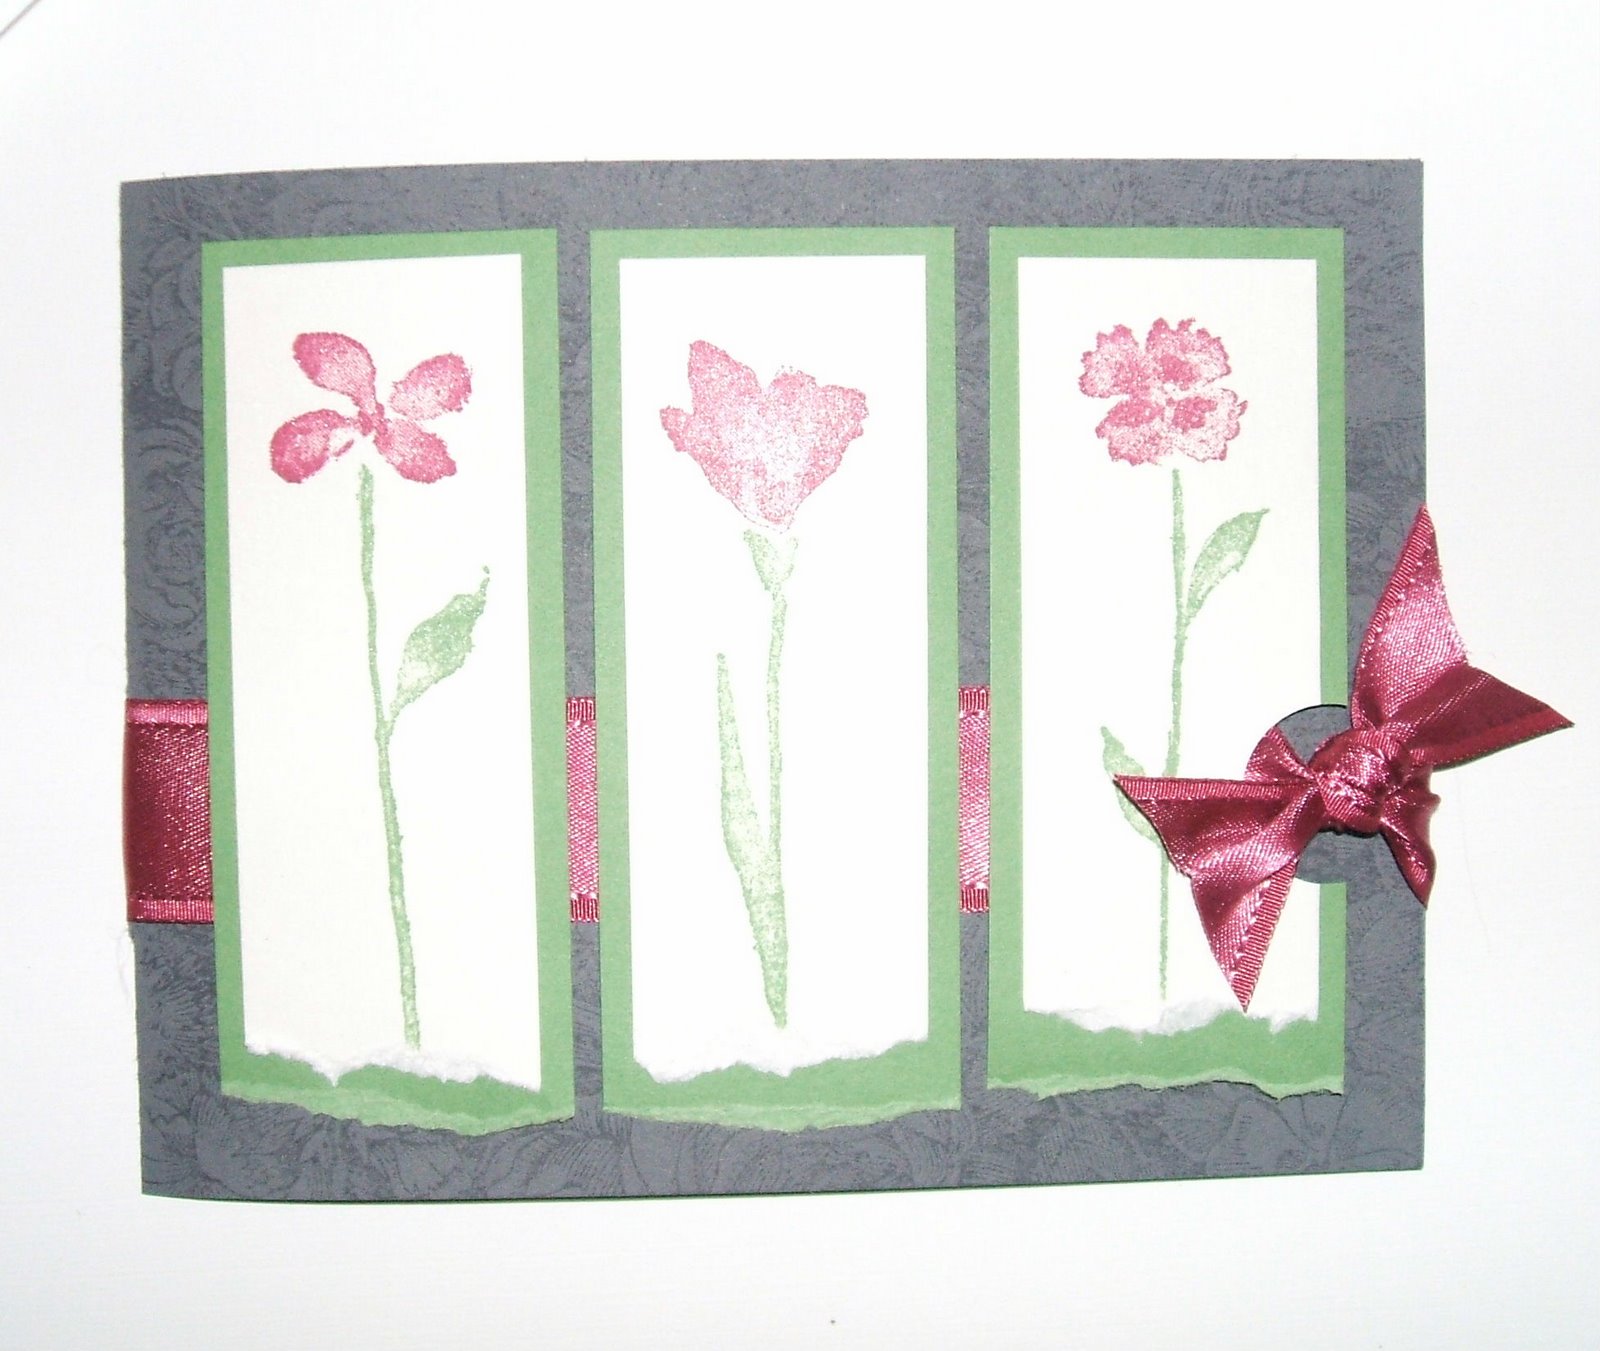
For mine, I used the leftovers from the Winter Bright SS kit that I used to make my Christmas cards. I do have a tip for you for scoring and folding the folder into the 4 pockets. Make the two outer pockets slightly smaller (In mine, that would be List and Calendar pockets.). I found that by scoring exactly in half, it didn't close properly and bulged a little. I used the five-in-one envelope template from SU to make the receipt envelope.

Hopefully, I will be doing some stamping today. I have 2 sets that have not even seen ink yet!

Wednesday, December 26, 2007

Embellished clipboard


This is the clipboard I made for my SIL Angela. It's the smallest chipboard clipboard in the SU catalog. I think it's 4 1/2 X 9. I used So Saffron and Certainly Celery Prints designer paper. The ribbon around the clipboard is from Fairy Tale Ribbon Originals, and I tied Certainly Celery and Apricot Appeal narrow grosgrain onto the clip. I put magnet tape on the back so she can put it on her fridge.

Hope Santa brought you what you wanted; he was good to me!

Sunday, December 23, 2007

Merry Christmas Everyone!

Yesterday, I was able to get all of my Christmas projects done. Hooray! I'm usually very last-minute (like with my mom's present last week!), so it felt good to get them done. Of course, I did put off wrapping everything today, but nobody's perfect, right?

I feel pretty safe posting this gift for my SIL because I don't think she reads my blog. This frame started life in the dollar spot at Target (see photo below). Quite a difference! I decided to use the Apple Cider designer paper because I wanted something masculine to go with the photo of my nephews, and also because Loretta's favorite color is green so I knew Wild Wasabi would be perfect. I measured the frame and then cut the two pieces of paper. To cut out the inside part of the paper, here's a great tip that I got from Emily Giovanni's tutorial on SCS: Take out the paper and glass from the frame opening. Then lay the frame upside down over the paper and trace the opening to make the perfect template for you to cut. I used sticky strip to adhere the Wild Wasabi double-stitched ribbon.
To all of you who are so faithful to read my blog, thank you! I wish everyone a very Merry Christmas! I'll be back in a couple of days to show some more projects I've gotten done.


Thursday, December 20, 2007

I've got talented friends and family


Here are 3 Christmas cards I recently received. The card on the left is from my mom, Pat. (Hi, Mama!) Love the chipboard star! The middle card is from my friend and fellow demonstrator Carol. She is scgustaf on SCS and has great things in her gallery there! Her card came with a loaf of homemade cinnamon bread; can't wait to dig into that. The card on the right is from my friend Rhonda. The berries are glittery!

It's a good thing they are stamping, because I am not! I spent tonight poring over my NEW catalog. I went through it twice to make up for the fact that I've hardly had a chance to look at since it arrived on Tuesday. I can't have it feeling neglected!

Tuesday, December 18, 2007

Stamping class tonight!


Tonight was Sandi's monthly stamp class. She always has the prettiest projects! Tonight's set was Heartspeak, which is retiring after this month. We did a lot of coloring! The bird card was stamped on watercolor paper with Black StazOn and colored in with watercolor pencils. That was tough for me. The amethyst card was stamped with Basic Brown and colored in with markers. It's hard to see in the photo, but the photo corners and the strip of brown cardstock were stamped with En Francais also. I really like the green card! The image was stamped with Timber Brown StazOn and colored in with ink and blender pen. That one worked the best for me.

Instead of a stamp set, I decided to get the neutrals markers and Build-a Brads. Can't wait to play with those; they look way cool!

Well, I've been a very good girl tonight. I got my mom's Christmas presents ready to mail AND HAVEN'T EVEN OPENED MY NEW CATALOG!!!! It came today, and I'm off to check it out now. Happy stamping!

Sunday, December 16, 2007

Look what Rhonda gave me!


It's called a vertical album, and it holds a scrapbook page. Isn't it cool?? We both saw it on Sharon Harnist's blog here: http://paperfections.typepad.com/paperfections/2007/09/desk-calendar.html . Clever Rhonda got her husband to help her make some! Now all I have to do is figure out what to put in it... That'll definitely be a post-holiday project.

Sorry, I haven't been stamping. I got my Christmas cards finished. Now I have to get them in the mail. If only they would mail themselves! I do have several projects to complete for Christmas giving. I'll only be able to show a few as some of the recipients read my blog. Hope your projects are going well!

Thursday, December 13, 2007

Monochromatic Z Fold Card


Today's challenge on SCS was a monochromatic card. I automatically thought of Basic Gray since it's my FAVORITE! I decided to do a Z fold card. Basically, you just fold the card front back on itself. I also used my new set from the upcoming Spring/Summer catalog, A Beautiful thing. I stamped the solid flower in silver and embossed with clear EP. Then I used my Stamp-a-ma-jig to stamp the outline in Black StazOn. (The EP was slippery, so the images smeared a bit. I'll try to do better next time.) I wanted to add my taffeta ribbon, but I couldn't figure out where to put it. Let me know if you have a suggestion on where it should go.

Supplies (all SU): Stamps: A Beautiful Thing; Paper: Very Vanilla, Basic Gray (both regular and textured), Charbon; Ink: silver, Black Stazon; Accessories: clear embossing powder, ticket corner punch

Stampin' Up has mailed our free catalogs, and some lucky demonstrators in Canada have already gotten theirs! You can catch a glimpse here: http://paperpleasing.typepad.com/my_weblog/2007/12/nothing-like-a.html

Also, I've gotten a look at the upcoming Sale-a-bration sets, and THEY ROCK! There's a set for the scallop circle punch, and there's also a set of rub-ons IN 4 COLORS!!!

Tuesday, December 11, 2007

It's a Beautiful Thing!


Getting new stuff, that is. Whoohoo! My preorder came yesterday. I was VERY good, though. I didn't get hardly anything. I just love the new stamp set called A Beautiful Thing. I made the border using one stamp that has 4 flowers in a row. The centers are 4 in a row too. I got the color combo from the new Bali Breeze paper. It's not one I would come up with on my own, but I like it! I'm looking forward to playing more, so stay tuned...

Supplies (all SU): Stamps: A Beautiful Thing, Celebrate Everything; Paper: Confetti White, Old Olive, Bali Breeze ds paper; Ink: Old Olive, Pumpkin Pie, Taken with Teal; Accessories: ticket corner punch, Always Artichoke narrow grosgrain ribbon, cutter kit

Sunday, December 9, 2007

The Last of the Christmas Cards

Here's the last of my cards from the Simply Scrappin' Kit. I really like the one in the upper left corner. I made it a gatefold card and cut the snowflake sticker in half.
Tomorrow, I get my pre-order from the new catty!! So I should have some purty new stuff to post soon.
Also, the retiring accessories list is being released tomorrow. Out with the old, in with the new!

Friday, December 7, 2007

More Christmas Cards


Here are more cards made with the Simply Scrappin' Kit. I just love the card with the double star on it. I got that great idea from Caroline at www.craftincaro.ca . She is so talented!

On Monday, my preorder from the new catalog arrives. Whoohoo! Some people have already gotten theirs, so check out the gallery at SCS.

Wednesday, December 5, 2007

It's Beginning to Look a Lot Like Christmas...

Last Saturday, we had a big storm that definitely made it look like Christmas outside. So while the storm raged, I watched my all-time favorite Christmas movie, White Christmas, and made Christmas cards.
This year, I'm using the Winter Bright Simply Scrappin' Kit to make my cards. By cutting the cardstock into 4 X 11 pieces, I can get 24 cards from the kit. I made a few a while back, but I was able to make 13 more while I was watching the movie. Easy peasy! I'll have 2 more photos to post as the week goes on, so check back. (You can also subscribe to my blog using Feedblitz over on the right. You'll get e-mail notifications letting you know when I have a new post. Thanks, Crystal, for the idea!)

Tuesday, December 4, 2007

The Winner Is...

Random.org generated the number 9. The winner is Jan Scholl, who said, "the only set on the list I wanted, I just ordered last week, so I wasnt disappointed at all. I am suprised at how fast the monograms came and went-in stamps, magazines and stuff like that. I got 6 of them. "
Congratulations, Jan, and thanks for all who commented!

5,000 Hits! Time for some blog candy


Wow! I can't believe I've already had over 5,000 hits on my blog. Thanks so much to all of you who keep coming back, and special thanks to those of you have commented or e-mailed me. It really means a lot to me!
To celebrate, I am giving away a flip book that is ready to be altered. It has an easel attached. And you need to decorate it, right? So I'm including a Just Delightful Simply Scrappin' Kit from last year's Sellabration.
To be entered to win, leave a comment by 6PM Central Time on Tuesday, December 4. In your comment, please leave your name and e-mail address so I can contact you if you win. Please tell me what set you are most disappointed is retiring or what you most hope to see in the new catty.
I will be leaving this post at the top until Tuesday, so please scroll down to see new posts.

Monday, December 3, 2007

Debbie Olson's Sketch


If you are one of the five stampers on the planet who haven't visited Debbie Olson's blog, get over there right now!! (The link is over on the right.) She is one of the most talented stampers around. And she's modest and sweet too! (Not that I've actually met her, but she has responded to comments I've left on her blog.) WARNING: She is a great enabler for lots of products!

This past weekend, she came up with a great sketch for Lisa Strahl's birthday celebration on the Cornish Heritage Farms website. Her cards used some beautiful Thomas Kincaid stamps, but when I saw the sketch, Easy Elegance popped into my head right away. I LOVE this set (Why, oh why couldn't SU have kept it around??), and I'm happy with the card too.

If you see this, Debbie, thanks for all of the inspiration!

Supplies (all SU): Stamps: Easy Elegance, Floral; Paper: Shimmery White, Basic Gray, Wild Wasabi; Ink: Basic Gray, Purely Pomegranate, Wild Wasabi; Accessories: Purely Pomegranate satin ribbon, 3/4" circle punch

Saturday, December 1, 2007

I've Been Elfed!

Splitcoaststampers had this great program going for a while where you could "elf" someone. That means sending them a Christmas gift, sort of a Pay It Forward program. It grew way more than expected, and the coordinators got overwhelmed. But over 700 people were elfed, and I am one of the lucky ones! It can be anonymous, but my elf outed herself. It was Peggie Sue, AKA craftidomesticdiva. She sent me this super cute card as well as an EXTREMELY generous bag of goodies! I already ate the chocolate!
You can check out Peggie Sue's blog here: http://fabricscraps.blogspot.com/ . She lives in Georgia. Go Dawgs! (That's my alma mater. University of Georgia) Peggie Sue, if you see this, please tell me what you used to make that background paper. It looks like coffee filter but it feels thicker than that, like interfacing or something similar.

It's Retired List Time Again!

I can't believe another new catalog is already just around the corner! WHOOHOO! That will really help me through the after-Christmas letdown. I'm happy to report that I only have 10 sets that are retiring. The big disappointment for me is they are retiring Bodacious Bouquet! I LOVE that set.
Here is a link to the list: http://www.stampinup.com/us/documents/US_Retired_List_PGNUM_1207.pdf
Also, SU has recently redesigned their website, and it looks sharp! Check it out here: http://www.stampinup.com/us/enu/default.asp

Thursday, November 29, 2007

Can you find the stamping on this card?

The words "Get well soon" are the only things on this card that are stamped! I needed a get well card for a supervisor at work who had an appendectomy last weekend, and I didn't really have time to sit down and come up with something fabulous and hand-stamped. I mean, really, the Dancing with the Stars finale only happens twice a year, right? So I decided to use the Just Delightful Simply Scrappin' kit from last year's SAB. The card is another big one-- 5 1/2 X 8 1/2. I used Shimmery White for the card base. The flowers are all stickers as is the border at the bottom of the card. The stamped sentiment is from Sincere Salutations, stamped in Bashful Blue and matted with Mellow Moss. Of course, I had to use the ticket corner punch! But I messed up punching the upper right hand corner, so I covered the booboo with a sticker! And I was able to make the card while watching DTWS, so I didn't miss a thing!
In other news, the retiring list comes out on SATURDAY! Also, we're getting really close to 5000 posts, so I should have a blog candy giveaway for Saturday as well. Stay tuned!

Monday, November 26, 2007

It's the Jolliest Time of the Year!


Tonight was my up-up-upline, Sandi's monthly stamp class. These are the cards we made using Jolliest Time of the Year. Sandi always has the cutest cards for us! It was fun to color all of these with markers. They are also all glittered. (I'm glittered, too, and probably will be for days!)

Saturday, November 24, 2007

SU is helping you Wrap Up the Holidays!

From November 23 thru December 15 (while supplies last), Stampin' Up! is helping you wrap up the holidays. They're offering specials on wrapping paper, ribbon, gift card holders, tag-making supplies and more! To see all of the details and get some project ideas, go to the SU website here: http://www.stampinup.com/us/enu/9255.asp or e-mail me for more info.

Also, the previous post was # 100!! I've also had over 4400 hits on my blog. Thanks so much to all of you who keep coming back! When I hit 5000, I'll have another blog candy giveaway, so keep checking for more details.

Thanksgiving Photos for Jake

My nephew, Jacob, is going to college in New York City, and he wasn't able to be with us for Thanksgiving. So here are some photos for you, Jakey, so you'll know what happened and how much we missed you!


We're all waiting patiently for Shirley's delicious dinner. Shirley, Larry and Teddy sat at the card table off to the right of the photo.

L to R: Dane, Daniel, Loretta, Mike, and Scott.


Shirley set a place for Jake at the table without even realizing it until everyone sat down. This is Jake's spot.
Teddy celebrated his 3rd birthday today. He was very excited because he got his very own cards. (Emmerts LOVE to play cards!)
Teddy blows out the candles. He helped Shirley make the cake and the frosting.


Thursday, November 22, 2007

Happy Thanksgiving!

Here's what I was working on this week: 20 lip balm holders for my MIL, Shirley. She's an Avon lady. I'm going to her house today for Thanksgiving, and I wanted to give them to her so I don't have to mail them. These look complicated, but they really aren't! (I've done all of the hard part by figuring out the measurements for you.) I originally made one using a pattern from SCS only to find that it was too small for my Avon Dew Kiss, so I altered that pattern. The one I made is for a 2 5/8" lip balm.
The outside piece of cardstock is 4 X 5 1/2, scored at 2 3/8 and 3 1/8. (Score with the long side of the cardstock against the top of your cutter/scorer.)
For the inside piece, the cardstock is 3 3/4 X 5 1/4. Put the long side of the cardstock at the top of the cutter/scorer and score at 2 1/4 and 3.
To make the 3/4 cuts, line up the long side of the CS at 3 1/2 and cut from 1 7/8 to 2 5/8. Move the CS to 3 1/4 and cut again from 1 7/8 to 2 5/8. Turn the CS 180 degrees. Line up the CS at 3 1/2 and cut from 2 5/8 to 3 3/8. Move the CS to 3 1/4 and cut again fromo 2 5/8 to 3 3/8.
To make the 1 1/2 cuts, line up the long side of the CS at 1 1/2 and cut from 1 1/2 to 3. Move the CS to 2 1/4 and cut again from 1 1/2 to 3.
Push all of the cut pieces toward the inside and crease all of the score lines.

I stamped Enjoy from Be Happy and punched it out with the 1 1/4 square punch and punched out the mat with the 1 1/2 square punch. The ribbon is 12 inches and is adhered all the way around. The patterned paper is 2 1/2 square.


I put adhesive on all of the edges, the entire spine (excluding the cut parts), and the entire line next to the spine. I adhered the spine first and then each side, folding at the score before adhering.
I probably won't be able to post SU's new specials tomorrow as Shirley has dial-up at her house. So be sure to check SU's website tomorrow or back here on Saturday night!


Tuesday, November 20, 2007

SU News Flash!

Stampin' Up will be Wrapping Up the Holidays starting Friday, November 23rd thru Saturday, December 15th. This will feature some existing catalog items (including Holiday Mini items that would no longer be available after Nov. 30!) and some new items just for this campaign. Stay tuned for more details on Friday!

My New Set from Shelli!


Here's my first card with my new Level 3 hostess set, Time Well Spent. It will be in the new Spring/Summer catalog available January 2nd. I made this card for Beate's Weekend Sketch Challenge. I don't think this is really my kind of set; I don't really like to color too much. But I certainly won't turn down free rubbah! I did pick up this cool idea from the Stampin' Up website, though. For the dots on the flower, I punched them out with the 1/8" circle punch and then put a Chocolate Chip scallop circle behind it.
Supplies (all SU): Stamps: Time Well Spent, Fundamental Phrases; Paper: Kraft, Almost Amethyst, Almost Amethyst Prints, Chocolate Chip; Ink: Basic Brown, Chocolate Chip, Lovely Lilac ink and marker; Accessories: 1/8" circle punch, scallop circle punch, word window punch, chocolate chip wide grosgrain ribbon, ice circle brads

Sunday, November 18, 2007

Winter Bright Christmas cards

This year, I'm using the Winter Bright Simply Scrappin' Kit to make my Christmas cards. This kit is so pretty! It comes with 8 sheets of 12X12 textured cardstock, 6 sheets of double-sided designer paper, and 6 6X12 sheets of stickers. The stickers are shimmery! Here are the 6 cards I've made so far. I was really tired when I was making these on Friday night, so I fell back on my standard card I make. But I'll be CASE-ing some of Caroline's cards from her blog too: www.craftincaro.ca . She also decorated a tin to match. By cutting the cardstock at 4 X 11, I can get 3 cards from each sheet of cardstock for a total of 24. However, I'll be saving some of my supplies for another project. I can't say what it is because the recipient reads this blog!
Here is a close-up of a border I made using the retired small corner rounder punch. I got this from Cambria's blog; her aunt was the one who came up with this great idea! I tried to take photos but couldn't get good ones today. I'll try again some other time. Basically, you take the guard off the punch. Then you punch one scallop on the piece of cardstock. To make the next scallop, line up the cardstock edge with the edge of the V inside the punch. Like I said, I'll do my best to get some good pictures later. Right now, I need to finish the 20 lip balm holders I'm making for my MIL, the Avon lady. (Hi, Shirley!) I'll post the photo and directions when they are finished.

Thursday, November 15, 2007

Happy Birthday, Mama!

As promised, here is Mama's birthday card. Today is her birthday; I won't give away her age, but she is really young (as am I!).
I made this card for Beate's weekend sketch challenge. The sketch was a square card with a square layer and a circle in the middle. I decided this would be the perfect opportunity to use my Pretties Kit. If I can't splurge on the goodies for my mama, who would I use them for?? I made the card 4 1/4" square so it would fit in a regular envelope. Soft Sky is her favorite color, so I decided to use Basic Gray and Purely Pomegranate with it. Love, love, love this color combo! (Thanks, Stampersharon, for using it in the color combo challenge a few weeks ago.) I cut the Pomegranate layer 4" square and the Charbon layer 3 3/4" square. I cut the circle with the Coluzzle, using the flower to decide what size circle to cut. I colored the flowers by smooshing (yes, that's the technical term!) them on my ink pads. On the big flower, I used my aquapainter to get the color down into the grooves. It looked a little uneven when it was wet but was fine after it dried.
OK, I was a complete idiot when I made the stickpin. For some reason, I had it in my head that I needed to put crimped beads on to keep the beads on each end of the pin. I just realized that DUH! I could have just put the pin through the big flower. HELLO!! So because of how I did it, I had to use 2 pop-up glue dots stacked on top of each other under the pin. I just hope that the card stayed in one piece on its journey south.
At least it looks pretty!

Tuesday, November 13, 2007

Elegant Bookmark


This would make a great addition to that book you were planning to give for Christmas. Some genius on SCS came up with it; I take no credit! It's made using the gorgeous satin ribbon from the Holiday Mini. I used Chocolate Chip. I recommend starting with 12". I folded each edge over twice (using Sticky Strip) to prevent fraying. Each end has 2 scallop circles punched from Brushed Gold cardstock. For the other piece, I stamped Baroque Motifs in Chocolate Chip onto Shimmery White cardstock. Then I sponged Creamy Caramel on it to make it beige. Everything is stuck down securely with Sticky Strip so it will hold up to use.

New Catalog Time is Approaching!

Here are the dates from Stampin' Up!
Nov. 30 -- Spring/Summer preview brochures begin mailing to customers
Dec. 1 -- Retiring stamp sets list and Spring/Summer dormant list released
Dec. 10 -- Retiring accessories list released (only available while supplies last!)
Jan. 1 -- Last day to order from Fall/Winter catalog
Jan. 2 -- First day to order from Spring/Summer catalog
Feb. 1-Mar. 17 -- Sale-a-bration
Mar. 1 -- Occasions mini catalog starts
So far, I have only gotten a few sneak peeks at what will be in the preview brochure. What I have seen is GORGEOUS! Also, Stampin' Up! is sending all active demonstrators a FREE level 3 hostess set from the new catalog. Mine is arriving on Friday, so hopefully I can play with it this weekend!

Sunday, November 11, 2007

One More Christmas Ornament


This is a simple but pretty ornament. I cut 3 different patterns from the retired Holiday Thyme paper into 1/2" X 3" strips and rolled them up. Then I just dropped them into the glass ball! Because the paper is double-sided, there are 6 patterns in there.

I made a card for Beate's weekend sketch challenge, but I can't post it yet because it's my mom's birthday card. I'll post it on Thursday, which is her birthday. She should have it then.

Friday, November 9, 2007

Money Holder Card


This is the last project from my workshop Wednesday night. We had a great time! (Hi, ladies!) We made a chipboard ornament, the spotlighting card, and this card. This is the perfect card for this time of year, but you could also use it anytime for birthdays, weddings or graduations just by changing the paper. This was a demo challenge on SCS, and the awesome demo who came up with this can be found here: http://stampnscrapwithpaula.blogspot.com/2007/10/christmas-giftables.html . Also, the card is part of the gift; it has a belly band around it instead of a boring envelope.
For my card, I used a 7 1/2" square piece of cardstock scored at 1 3/4 and 4 3/4. The inside piece of paper is 1 1/2 X 7 1/2, the paper on the outside of the card is 2 5/8 X 7 1/2. The belly band is 1 1/2 X 7 1/2.
The great thing about the Dashing paper is that I didn't need to measure for the outer piece or the belly band! The outer piece is 3 1/2 squares X 10 squares, and the belly band is 5 squares X 1 square. Very handy for making multiples!
I don't buy Christmas stamps, so I used the flower from Priceless for the embellishment on the belly band.
Supplies (all SU): Stamps: Priceless; Paper: Real Red, Old Olive, River Rock, Very Vanilla, Dashing; Ink: Real Red; Accessories: 1 1/4" circle punch, 1 3/8" circle punch, scallop circle punch

Tuesday, November 6, 2007

Christmas ornaments!

If you want to make Christmas ornaments, now is the time! Not only is it November, but Stampin' Up! is helping with the Paper Party promotion. Buy 3 packages of Designer paper and get the 4th for free!
Here are 4 ornaments that I made recently. In the upper left is the scallop circle ornament I posted a few days ago. In the lower left is a paper star. It's made from a 6" square of Apple Cider paper scored at every inch. Fold accordion-style and staple in the center. Cut each end off at a diagonal, and open up the star, adhering the two edges together with sticky strip. Julie has a video tutorial here: http://paperpleasing.typepad.com/my_weblog/2007/10/ive-gone-live.html I will try to make a photo tutorial later this week as well. The 2 ornaments on the right are from the On Board Trimmings chipboard set from the Holiday Mini Catalog. For the circle, I used Ruby Red craft ink to color the front and edges. Then I traced the circle onto the Dashing paper, cut out the circle, and adhered it to the back of the ornament using SU Anywhere glue stick. I punched the hole for the string with the Cropadile. The snowflake is the piece punched out of the center of the circle. I covered it with Bashful Blue craft ink. Then I sprinkled it with Irridescent Ice embossing powder and melted the embossing powder with the heat tool. Again, I used the Cropadile for the hole.

Sunday, November 4, 2007

Scallop Circle Ornament

I made this a while ago but hadn't posted it in case I decided to do it at a workshop. I finally decided it would be too hard to do this at a workshop, not because it's hard to make but because it would be hard to share the punch and adhesive for it.
This ornament is so cute! It's hard to photograph because it's 3D but looks great IRL. The scallop punch is just under 2 inches in diameter to give you an idea of the size.
It's made from 8 scallop circles, each folded in half and glued together. I used the greeting glue, which made it a snap to put together. Then before adhering the last 2 pieces together, I added a loop of gold elastic cord with a crystal bead from the Pretties kit tied at the bottom for a little sparkle.
I still haven't settled on my workshop projects for Wednesday, so I'd better go and get busy! Thanks for looking!

Friday, November 2, 2007

Another BIG card!

Making cards for work is tough because they have to be big enough for lots of people to sign on the inside. This card is a full sheet of Soft Sky cardstock folded in half for a 5 1/2 X 8 1/2 card. This fits into the largest SU envelope. Less cutting too!
I made this card in about 15 minutes, and most of that time was spent trying to remember which way the eyelet goes on the Cropadile! I decided to use the Word by Word bg stamp. It's oversized, so the finished piece was 4 7/8 X 6 (I think). I inked the whole thing with Soft Sky then just inked some of the words with Wild Wasabi. (I made my own In Color spots, so inking small areas is easy!) I mounted that piece on Wild Wasabi then attached it to the card. Two quick holes with the Cropadile then 2 pewter jumbo eyelets, and all I had left to do was add the ribbon. Quick and cute!

Tuesday, October 30, 2007

I'm Loving Priceless!

Last night, I attended a class at my up-up-upline Sandi's house. This month's stamp set was Priceless. I love it, and it has a TON of stamps in it. (OK, 11 but that's a lot!) The cards we made were great. The card in the upper left is Naturals Ivory, Blue Bayou and Close to Cocoa. Great color combo, and the Tres Chic bg is fantastic. The card in the upper right is Basic Black and Groovy Guava. It uses the jumbo wheel that goes with Priceless. The bottom card is Whisper White and Soft Sky. It's hard to see in the photo, but we used the Priceless classy brass template on the white piece. I love how she had us punch out the flower with the 5-petal punch; I would have never thought of that!
It was so fun to just hang out with my friends and stamp!

Sunday, October 28, 2007

Z-Fold Card in My Favorite Color Combo!

Beate's weekend sketch challenge this week is a Z-fold card. Basically, the card front is scored in the center and folded back on itself. I've been wanting to make one of these since I saw it in the Technique Junkies newsletter, but I hadn't gotten around to it yet. (If you aren't a subscriber, you are missing out! Check out Pat Huntoon's website: http://www.patstamps.com for more info.)
I decided to combine the sketch challenge with this week's Color Combo Challenge: Basic Gray, Purely Pomegranate and Soft Sky. What's not to love about that?
I sponged Soft Sky ink onto Shimmery White cardstock. I stamped the image from Stem Silhouettes in Basic Gray and used a dauber to add the Purely Pomegranate to each flower. (I got that idea from the always awesome JanTInk.) I attached the hardware to the Soft Sky paper before adhering it to the card base to hide the prongs of the brad.
Tomorrow night, I have another class at my upline Sandi's house. We are using Priceless. Look for the projects later in the week!
Supplies (all SU): Stamps: Stem Silhouettes; Paper: Shimmery White, Soft Sky, Basic Gray, Purely Pomegranate, Charbon, Soft Sky Prints; Ink: Soft Sky, Basic Gray, Purely Pomegranate; Accessories: sponge, dauber, ticket corner punch, Aged Copper Hodgepodge Hardware

Awesome Rockin' Concert!

Last night, we went to a fantastic concert here in Duluth. Thousand Foot Krutch, BarlowGirl and TobyMac played at the DECC. It was in the arena where they usually hold hockey games. All of the floor area was standing only. There were about 4000 people there, which was one of their biggest shows.Linda, Sean, Daniel (hiding behind Sean!), Linda and Joe
Thousand Foot Krutch. I couldn't get a good photo of them, unfortunately. They were hard-rocking!

BarlowGirl. They are sisters and play their own instruments. For this particular song, the drummer is out singing. The sister on the right plays both guitar and keyboard, often in the same song!


TobyMac had an awesome stage set-up. At one point, a ceiling tile fell down onto the stage!


Toby is second from the left. All of the band members are so talented! They dance as well as sing, and some of them rap. It was full out for an hour and a half. Toby is my age, and I loved when they did a medley of songs from the 70s: Play That Funky Music White Boy, LeFreak, That's The Way. I felt like I was back in junior high!


This is a great shot of the stage and crowd. During the encore, the lights spelled out Jesus Freak.


Friday, October 26, 2007

One Layer Card

The Ways to Use It challenge on SCS yesterday was masking. I decided to do a one layer card using reverse masking. I am not a one-layer-kind of gal! Anyway, reverse masking is where you have an open area in the middle instead of a regular mask where you cover up one specific item. Luckily, I already had a piece of cardstock that I had cut an oval out of the center using the Coluzzle. I used Confetti White cardstock for my base, and I decided to use Sahara Sand, Always Artichoke and Bravo Burgundy for my color combo so I could use my new Always Artichoke ribbon. My plan was to tie the ribbon around the card up against the fold. However, I forgot to center my oval on the cardfront, so when I sponged in the ink, the oval was to the left of center. To fix that, I cut a little of the right side off and used the corner rounder (with the guard off) to make the scalloped edge. I stamped the image from Stem Silhouettes in all 3 colors, using the stamp twice for each color without reinking. The Sahara Sand image looks like a shadow!
Since I couldn't tie the ribbon at the fold, I had a hard time deciding what to do with it. I finally just made a small bow and adhered it at the base of the oval with a mini glue dot.
The one unfixable mistake was the sponging along the side of the card. I wanted to emphasize the fact that the right edge was scalloped, but I had to sponge too much to fill in all of the scalloped area.
Overall, though, I'm happy with the card! If you make a one layer card, post a link here so I can check it out!
Supplies (all SU): Stamps: Stem Silhouettes, Fundamental Phrases; Paper: Confetti White; Ink: Sahara Sand, Always Artichoke, Bravo Burgundy; Accessories: sponge, Always Artichoke narrow grosgrain, Coluzzle, retired corner rounder punch

Thursday, October 25, 2007

Paper Clip Bookmark

This is the time of year that I start to think about gifts. I love giving little homemade gifts such as this bookmark. Of course, this wouldn't be the ONLY gift unless the person is on the naughty list! LOL
This bookmark is made from a jumbo paper clip. I got a package of 15 at Walmart for 97 cents. For this particular bookmark, I used 2 pieces of chipboard. They held together and to the paper clip with a pop-up glue dot. (Think of it as a sandwich: chipboard, glue dot, paper clip smashed into the glue dot, chipboard.) The flower piece is covered with Almost Amethyst craft ink. The circle is covered with So Saffron Prints designer paper then has a flower center from Pick A Petal stamped on top. I also sanded the edges of the paper to make it fit the circle and then inked the edges with So Saffron ink. A Certainly Celery button with linen thread tied through it is attached with a mini glue dot. A piece of Certainly Celery narrow grosgrain add a decorative touch and mimics leaves.
These are fun and easy to make! Just make sure your chipboard is not too big. Otherwise, it won't fit into a book! You could also substitute punched piece, such as the scallop circle, for the chipboard.

Tuesday, October 23, 2007

My Second Favorite Color Combo

I am loving this color combo of Soft Sky and Blue Bayou! It is second only to Basic Gray and Purely Pomegranate (see the Spotlighting card a couple of posts down). I CASEd this card from another SU demonsrator; SU posted it on their website. I added the clear button to the center of the flower. It's hard to see in the picture, but IRL it adds a nice dimension. One of the things I love about this card is the stamping on the patterned paper. Why don't I ever think to do that??
Supplies (all SU): Stamps: Pick A Petal, Hugs and Wishes; Paper: Soft Sky, Blue Bayou, Soft Sky Prints Designer Paper; Ink: Soft Sky, Blue Bayou; Accessories: Soft Sky double-stitched ribbon, clear buttons, Bella fiber

Saturday, October 20, 2007

Weekend Sketch Challenge Revisited


After I finished my spotlighting card and posted it last night, I realized that I didn't follow the sketch! (*blushing and smacking forehead*) The horizontal piece is not supposed to go all the way across the card base. So I decided to give it another try and actually FOLLOW the sketch this time.
I started with the idea that I wanted to use the chocolate chip satin ribbon as a mat. And I wanted to use guava. The scraptitude color combo website isn't working, so I pulled up my 2007-8 Color Combo chart from Stampin' Up. (If you don't have this chart, send me an e-mail, and I will e-mail you a copy.) I found a combo with Groovy Guava, Wild Wasabi, So Saffron and Close to Cocoa. I substituted Chocolate Chip for the cocoa.
I stamped the flower from Looks Like Spring twice onto So Saffron cardstock, once each in Groovy Guava and Chocolate Chip. I cut them both out (this is really easy if you use paper snips) and used the CropADile to put a jumbo eyelet in the center. Helpful tip: The CropADile works best if you actually follow the directions that come with it! Then I put a rhinestone brad in the center of the eyelet. I did not come up with this idea myself; I've seen it lately on SCS. Whoever thought of it is a genius!
For the horizontal piece, I used the argyle stamps from Looks Like Spring. I used the Stampamajig to line them up. I cut the satin ribbon in half and adhered it to the top and bottom of the cardstock. When I tied the Wild Wasabi ribbon around the horizontal piece, I made sure it was loose enough that the satin ribbon would stay flat. I put a little adhesive under the Wild Wasabi ribbon so it would lay flat also.
I don't like this card as much as the spotlighting card. It looked better in my head! But I did follow the sketch this time.
Supplies (all SU): Stamps: Looks Like Spring, True Friend, Canvas; Paper: Confetti White, So Saffron, Groovy Guava, Wild Wasabi; Ink: Groovy Guava, Chocolate Chip, Wild Wasabi; Accessories: paper snips, CropADile, pewter jumbo eyelets, Ice circle rhinestone brads, mini glue dots, Chocolate Chip satin ribbon, Wild Wasabi double-stitched ribbon, ticket corner punch