Showing posts with label Inspired by Nature. Show all posts

Monday, October 24, 2011

CAS color combo card

Wow, I can't believe how fast fall is flying by!  Life has been so busy that I haven't even stamped for a while.  I'm going to try to schedule weekly stamping time now, so hopefully that will work.  I feel much better when I stamp on a regular basis!
I decided to make a quick card to try to get my stamping mojo back.  I'd written down a color combo: Calypso Coral, Riding Hood Red and Basic Gray.  I used Inspired by Nature much like I have in the past to create a sunset-type card.  I wanted to add a little something to it though.  I had a paper butterfly lying on my desk and decided that would look great with the flowers.  I used vellum so I wouldn't have to figure out what color the butterfly should be, LOL.  I also added a vellum tag for the sentiment with a Basic Gray ribbon bow.
Happy stamping!
Jana Signature

Monday, August 1, 2011

August Creative Crew challenge card #1

Here's the card I made for Ray for our 6-month anniversary.  It fulfills two of the August Creative Crew challenges: to use the paper-piercing tool and to use colors from Pocketful of Posies DSP.  I chose Rich Razzleberry, Early Espresso, Baja Breeze and Pear Pizzazz.
I stamped the images from Inspired by Nature onto Baja Breeze cardstock then embossed it with the Square Lattice embossing folder.  I used the ticket corner punch on that layer and the Early Espresso mat.  I stamped the flowers again onto Baja Breeze, cut out the big flower and popped up the image over the embossed piece; I got this idea from Renee at Stamping for Sanity.
The sentiment is from a retired Mini set called In a Word.  I used two different markers to highlight the word "us".  For the ribbon, I cut a slit in the Razzleberry ribbon to feed through the other end then tied it off with Early Espresso narrow taffeta ribbon.
Happy stamping!
Jana Signature

Monday, April 11, 2011

Bendy fold card

One of the Creative Crew challenges for April is to use Blueberry Crisp DSP or its colors: Very Vanilla, Sahara Sand, Pacific Point and Not Quite Navy. I decided to make one of Emma F's bendy fold cards. You can find her instructions here.
I stamped the grass in Pacific Point and then stamped the flowers in Not Quite Navy craft ink and embossed with Irridescent Ice EP. I also stamped the grass on the 2 front pieces. Crochet trim, a sentiment and rhinestones are the finishing touches.

Happy stamping!
Jana Signature

Wednesday, October 27, 2010

Shimmery Resist Take Two

I decided to try the shimmery resist technique one more time using a more solid image.  I have found that both times I've done this technique, the embossed image is a little spotty.  So this time, I colored over the embossed image with a versamarker and embossed again.  My coloring wasn't perfect, but I like the results much better this time!
Supplies: Stamps: Inspired by Nature, Filled with Love; Ink: Chocolate Chip craft and classic, Certainly Celery, versamarker; Paper: Baja Breeze, Chocolate Chip, Greenhouse Gala DSP; Accessories: clear EP, chocolate chip satin ribbon (retired), scallop edge punch
Happy stamping!
Jana Signature

Thursday, September 23, 2010

CAS fall color challenge

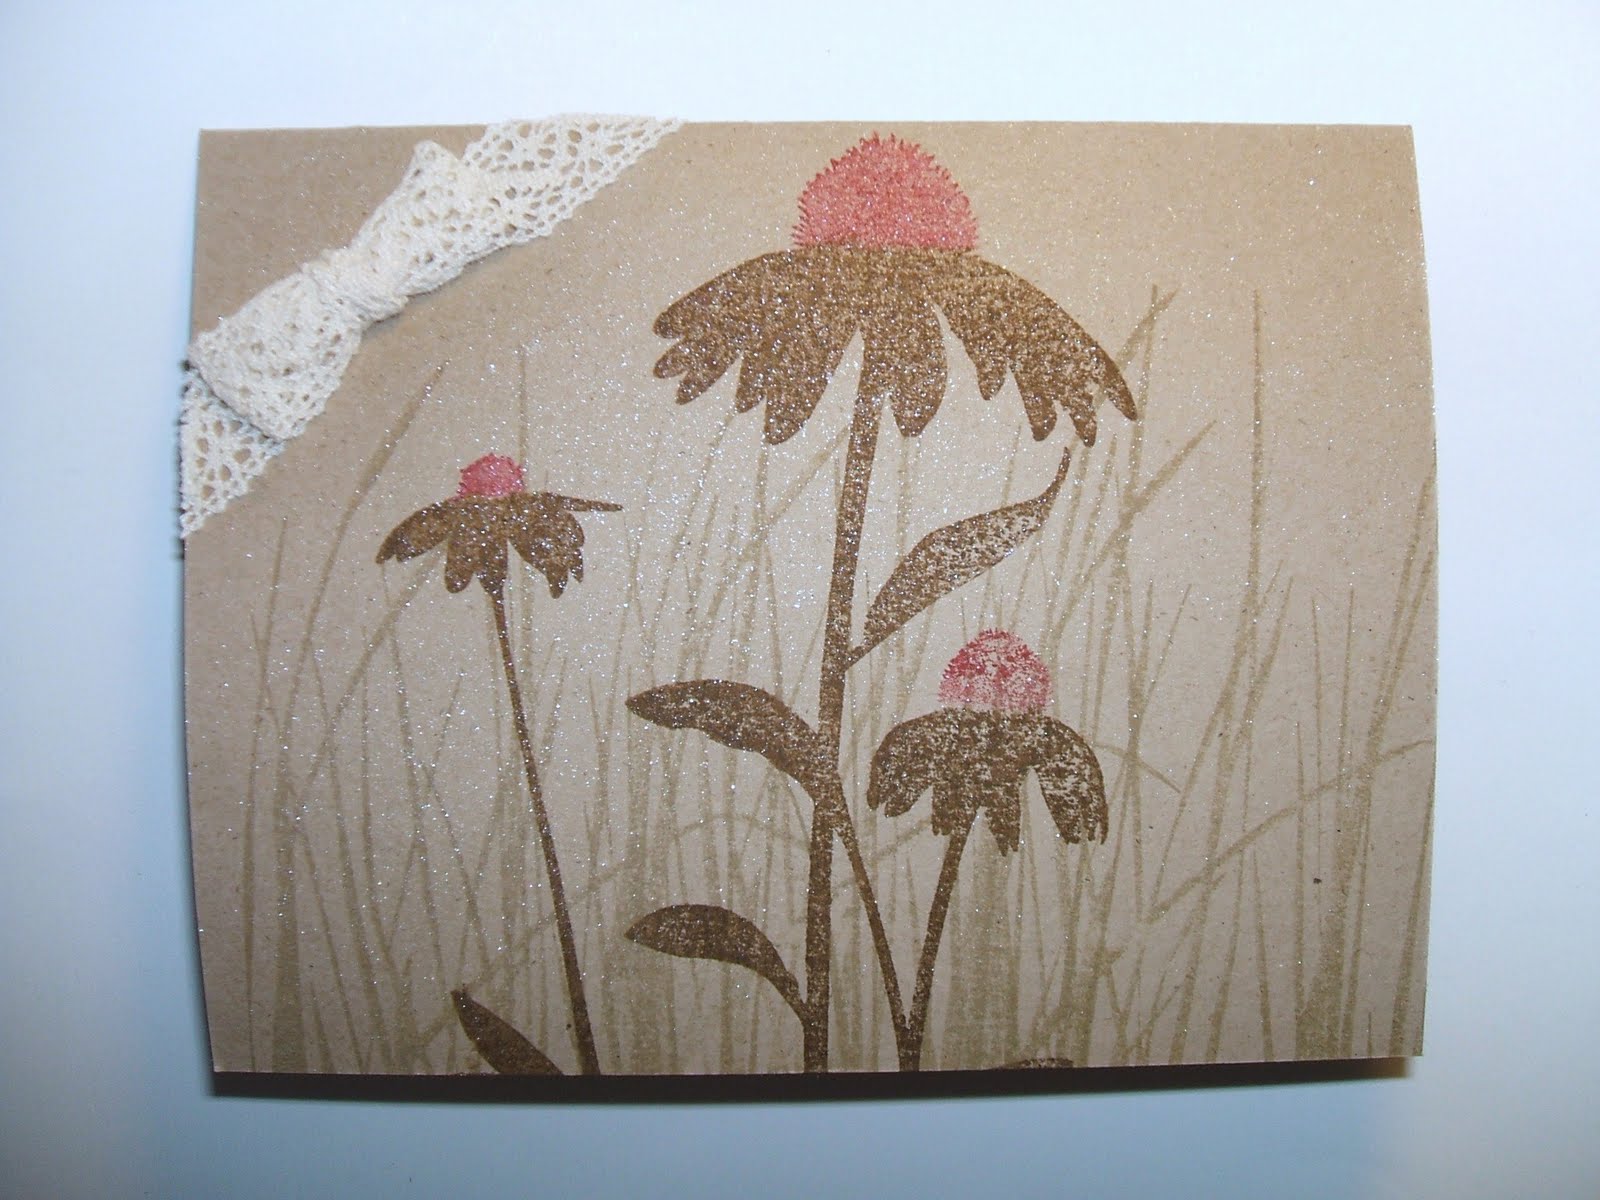
This week's CAS challenge on SCS was a fall color challenge: kraft, vanilla, brown and red.  To me, nothing says clean and simple like a one-layer card, so that's what I decided to do.  I used Inspired by Nature, inking up the coneflowers in Riding Hood Red and Soft Suede.  I stamped the grass in Crumb Cake.  I gave the whole card a spray of Vanilla Smooch Spritz and added a fork bow.  The ends of the trim are cut off even with the edge of the card and adhered with Mono Multi.
Supplies: Stamps: Inspired by Nature; Paper: Crumb Cake; Ink: Riding Hood Red, Soft Suede, Crumb Cake; Accessories: vanilla Smooch Spritz, Victoria crochet trim
Happy stamping!
Jana Signature

Monday, July 12, 2010

Quick and easy Inspired by Nature

Here's a quick and easy one for you today using Inspired by Nature. I started with Bashful Blue cardstock (3 X 3 1/4). Bashful Blue is a light enough color that you can stamp on it and the colors still stay true, so I thought it would be great for the sky. (If you wanted a sunset-ish background, you could use So Saffron.) I got my color combo from the new Color Coach: Bashful Blue, Rose Red, Old Olive. I stamped the flowers in Rose Red and the grass in Old Olive. Gold Glow Smooch Spritz is the final touch. I adhered the Bashful Blue piece to a Rose Red mat, added the Old Olive satin ribbon and tore the right edge of the mat. (I'll be showing you how to make this bow on Wednesday; it's awesome!) At first, I used an Old Olive cardbase, but that was WAY too much Old Olive. So I changed it to Bashful Blue, and I liked that much better. Old Olive grass makes a great background that mirrors what's going on in the main image.
Happy stamping!
Jana Signature

Friday, June 4, 2010

WICKED color challenge

Here's another card I made for this month's WICKED challenges. The challenge was to use Dusty Durango, and Dawn suggested a color combo of Dusty Durango, Soft Suede and So Saffron.
I used a piece of So Saffron cardstock for my focal image. First, I created a sun by sponging Crushed Curry (using a Post-It with a circle punched out as a stencil) and then sponging Dusty Durango around it. I also sponged Crushed Curry onto the edges of the cardstock. I stamped the coneflowers in Dusty Durango and the grass in Soft Suede. Then I sprayed some Log Cabin Smooch Spritz onto it. If I could do it over, I would use the gold instead because the brown looks like a swarm of bugs to me, LOL.
The cardbase is Dusty Durango stamped with Sanded in Dusty Durango, sprayed with gold Smooch Spritz, and the sentiment is from Boho Backgrounds stamped in Soft Suede.
Supplies (all SU): Stamps: Inspired by Nature, Sanded, Boho Backgrounds; Paper: So Saffron, Soft Suede, Dusty Durango; Ink: Crushed Curry, Dusty Durango, So Saffron; Accessories: sponge, cutter kit, Soft Suede grosgrain ribbon, 1 1/4" circle punch, Smooch Spritz (Gold Glow and Log Cabin)
Happy stamping!
Jana Signature

Wednesday, February 10, 2010

Z-fold card

For this week's demonstratable card challenge, I asked everyone to make a Z-fold card. To make the Z-fold card, you cut a piece of cardstock 4 1/4" X 11", score at 5 1/2" then score the front of the card at 2 3/4" and fold it forward to make the Z. Normally you leave it loose, but I decided to tie ribbon around mine. The Soft Suede mat is 3 13/16" (before punching) which is the perfect size for the scallop trim punches. The Rich Razzleberry mat is 3 1/8" and I stamped on a 3" Very Vanilla piece.
On the back part of the card, I punched the scallop trim corner punch on both corners then used the horizontal slot punch to make little slots for my mat to fit in to hold the card closed.
I got the color combo (Kraft, Rich Razzleberry, Soft Suede) from Jenn Diercks' blog.
Happy stamping!

Jana Signature

Monday, November 16, 2009

Eyelet Border Card

I have to admit that life has been so hectic lately that I haven't been inspired to stamp much. Today, I was cleaning off my computer desk, and I saw a Stampin' Success magazine. I leafed through it for inspiration, and I found a card with a layer that used the eyelet border all the way around it. How did I miss it before? I decided that I had to try it right away.
Just like in the magazine, I started with a 3 13/16" square of cardstock. On one side, center the punch, and punch the border on the entire side. (You should end in the middle of a hole on both ends.) Then turn the cardstock 90 degrees. Line up the cardstock so the last hole in the last full scallop you just punched is the first hole in the scallop you are about to punch. (See the picture below.) Repeat this on the remaining sides. Yes, the holes actually did line up in the end! TIP: When you start to punch each side, turn the punch over and make sure the cardstock is lined up straight in relation to the ledge where the cardstock normally rests on the front.
The finished piece was about 3 3/8" square. I matted it on a 3 5/8" square of Going Gray. The Crushed Curry cardstock inside it is 2 1/2" square. On that piece I stamped the flowers from Inspired by Nature with Versamark and embossed with clear EP. Then I stamped the grass in Going Gray. The ink just wipes right off the embossing.
On the Crushed Curry cardbase, I stamped my new Medallion background twice then tied on a piece of Basic Gray taffeta ribbon.

This is my first attempt at making the corner, and I didn't line up the holes correctly!
Let me know if you want a photo tutorial for making this border. If I get some requests, I'll try although I'm not sure how the pictures will turn out.
Jana Signature

Friday, September 11, 2009

LeeAnn Greff's tri-fold flip flap card

This week's workshop wow challenge was to make LeeAnn Greff's tri-fold flip flap card. Genius, LeeAnn!
I started with wanting to use Elegant Eggplant because I just got Eggplant rickrack that I wanted to use on the card. I went to my SU Color Combo sheet and found Elegant Eggplant, Crushed Curry and Old Olive. I have to say that Crushed Curry is quickly replacing Rich Razzleberry as my favorite In Color. Shocking, isn't it?
After I stamped the flower image from Inspired by Nature, I thought the color on the petals was a bit uneven, so I used my aquapainter to smooth it out a bit. I like the way it turned out!

Here is the inside of the card. A demo who made one of these on SCS noted that the fold-down flap gives lots of room for signing the card when it's from a group. Great idea!
Supplies: Stamps: Inspired by Nature; Paper: Very Vanilla, Old Olive, Elegant Eggplant, Crushed Curry; Ink: Old Olive, Elegant Eggplant, Crushed Curry; Accessories: Clips assortment, Orchard ribbon originals, Old Olive narrow grosgrain ribbon
Happy stamping!

Friday, July 10, 2009

3-D Card

Every month, SU sends demonstrators a magazine called Stampin' Success. Last month, they featured a 3-D card. Here's my version. I used Inspired by Nature. The color combo is Crushed Curry, Melon Mambo, Bashful Blue and Old Olive.
The grass is stamped on the Bashful Blue, and the flowers are cut out and popped with dimensionals.

Here you can see how one of the blue panels is not fully attached to allow the card to fold flat.

Happy stamping!

Friday, May 22, 2009

Quick card

This week's demonstratable card challenge was to make a monochromatic card using DSP (to highlight the Buy 3 Get 1 Free special for DSP and textured cardstock that SU is offering this month).
Mine was a super quick card that I made in about 20 minutes. I think 10 of that was figuring out what to do and using the heat gun twice! In fact, I made the card so fast that my layer measurements were off as you can see by looking at the top and bottom of the card.
For the focal image, I stamped the flower from Inspired by Nature in Creamy Caramel craft ink right onto the DSP and heat set it. Then I stamped the grass from the same set in Chocolate Chip craft ink and heat set it. The rest of the card is pretty straightforward.
TIP: The ticket corner punch is a great way to add a quick and easy special touch to your card. It's my most used punch!
Supplies (all SU): Stamps: Inspired by Nature, Oval All, Cute and Curly; Paper: Creamy Caramel, Chocolate Chip, Candy Lane DSP; Ink: Chocolate Chip classic and craft, Creamy Caramel craft; Accessories: heat gun, ticket corner punch, curly label punch, large oval punch
Happy stamping!

Friday, May 15, 2009

The same yet different

This card is very similar in layout to the one I posted on Wednesday. I just love the way the layers go all the way up to the fold of the card! I changed up the focal image layer although I kept the color combo and DSP the same. I also added the ticket corner punch to all of the layers including the cardfront. The daisies were inked in Baja Breeze and I used a sponge dauber to add Pacific Point to the flower center.
Supplies: Stamps: Inspired by Nature, Oval All; Paper: Shimmery White, Baja Breeze, Basic Gray, Urban Garden DSP; Ink: Baja Breeze, Kiwi Kiss, Pacific Point; Accessories: ticket corner punch, large oval punch, scallop oval punch, sponge dauber
Happy stamping!

Wednesday, March 4, 2009

Polished stone with a twist

If you are a regular visitor, you know that I am a demo challenge hostess on SCS. I am the lucky person who gets to invite demonstrators to be the WICKED stamper each month. I also get to be the first one to see their awesome projects and samples!
Last month was a busy one for me, so I was a little late trying the February challenges. This card combines the February color combo (Baja Breeze, Chocolate Chip, and Kiwi Kiss) with the technique which is polished stone. Kandicejo posted a beautiful card combining emboss resist with polished stone, and that inspired my focal image. I also used JanTInk's punchy plates technique and the sketch is based on WSC70 although I changed it a little.
If you need a refresher on polished stone as I did, there is an excellent tutorial here.
I started with a square of glossy white cardstock, stamped the grass image in Chocolate Chip craft ink and embossed with clear EP. Then I just followed the polished stone tutorial. I let it dry overnight and then wiped the embossed image with a paper towel to remove the excess ink.
I cut it down to 2 3/4" X 3 1/2". I cut it vertically at 1 1/8" and attached the 2 pieces to a Chocolate chip textured mat (3 1/4" X 3 3/4"). The plate is made with the key tag punch and the 1 1/4" circle punch. (Jan has an excellent tutorial for this on her blog.)
Supplies (all SU): Stamps: Inspired by Nature, A Beautiful Thing; Paper: glossy white, Baja Breeze, Kiwi Kiss, Chocolate Chip textured, Urban Oasis DSP; Ink: Chocolate Chip craft, reinkers (gold, Baja Breeze, Kiwi Kiss); Accessories: key tag punch, 1 1/4" circle punch, clear EP, silver brads, Baja Breeze striped grosgrain ribbon
Happy stamping!

Wednesday, January 21, 2009

Happy Australia Day!

I hope the bottom card isn't too scary for you; it scares me a little, LOL! Monday's demonstratable card challenge was a doozy. Cav, the hostess of that challenge, is Australian, and Australia Day is right around the corner (1/26 I think but not totally sure) so Cav had us use Australia's colors. We could only use Glorious Green, Yoyo Yellow, Whisper White and Very Vanilla. We had to CASE one of our own cards. We had to have an animal or insect somewhere on the card, and it had to be a birthday card. Wow!
The card at the top of the photo is the one I chose to CASE. I added a butterfly from Garden Whimsy as my insect. I'm pretty sure this was the first time I had cut any Glorious Green cardstock; I still had 3 full pieces in there from my first variety pack of cardstock. I think I bought that in about 2002, LOL! The ribbon is whisper white taffeta. I tried sponging it with ink and then ended up using chalk. I think the chalk worked pretty well!
Supplies (all SU): Stamps: Inspired by Nature, Garden Whimsy, Fundamental Phrases; Paper: Whisper White, Glorious Green, Yoyo Yellow; Ink: Glorious Green, Yoyo Yellow; Accessories: ticket corner punch, word window punch, double rectangle punch, pastels, sponge dauber, Whisper White taffeta ribbon
Happy stamping!

Tuesday, January 13, 2009

Diamond Fold Card

This week, the SCS demo workshop wow challenge is to make a diamond fold card. I saw it a while back on SCS, watched a video and made notes for myself. Believe it or not, I was able to make the card from my notes! Here is the original card I saw, and here is the link to the video. I did a photo tutorial for those who aren't able to watch video online. What I liked about this card is that there is very little measuring to do all of the folds.

Here is what the card looks like when it's closed. I tied it closed with a ribbon that can just slide off.


Start with a 4" X 12" piece of cardstock. On the back, mark it at 6" on each long side. As you can see from the photo, I just used my paper trimmer and a pencil.

Fold one side to that center line, and fold the other side to meet it. (Like making a paper airplane) Open it back up.

Tip: I used a bone folder on all of my folds to make sure they were crisp.


Turn the paper 180 degrees and fold in the same way. Open it back up again.


Your cardstock should now look like this. Fold each short end in to meet the corner of the center diamond. It will look like the photo below.

With the ends still folded in, turn the cardstock over, and fold the edges in to the center. The edges will line up with the top and bottom points of the diamond. Your card will now look like the photo below.

Open the card up. There are 4 triangles surrounding the center diamond. Push the triangles in so the card looks like the photo below.

For my card I decided to decorate the center diamond, the 2 end panels and the 2 triangles in between. My center diamond was just under 3" on each side, and the 2 triangles were slightly smaller than that. So I cut the chocolate chip squares at 2 3/4" and the glossy white squares at 2 1/2".

I got the color combo from the January Stampin' Success magazine. It's from the new Retro Style Watch collection in the upcoming catalog: Summer Sun, Kiwi Kiss, Pacific Point and Chocolate Chip. I inked my brayer with Summer Sun, Kiwi Kiss and Pacific Point and then brayered over the glossy cardstock until it was well inked. I get the best look using the brayer by rolling in one direction instead of back and forth. Then I stamped the grass image from Inspired by Nature in Chocolate Chip.

For the 2 side triangles, I cut both the mat and the glossy piece in half using my paper trimmer. This photo shows how I lined up the corners in the guide.

Supplies (all SU): Stamps: Inspired by Nature, Heard from the Heart; Paper: glossy white, Kiwi Kiss textured, Very Vanilla, Chocolate Chip; Ink: Chocolate Chip, Kiwi Kiss, Summer Sun, Pacific Point; Accessories: bone folder, brayer, Pacific Point striped grosgrain ribbon
Happy stamping!

Friday, November 21, 2008

Workshop Wow color challenge

I decided on a color challenge for this week's Workshop Wow challenge: Basic Black, Kiwi Kiss, Baja Breeze and Pacific Point. I used my brayer to make the sky after masking off the moon/sun then sponged in the color for it. Then I stamped the silhouette images with black. I matted each layer in black to make them pop and used Kiwi Kiss for my card base. I'm pretty sure this sketch was one of Beate's sketch challenges.
Supplies (all SU): Stamps: Inspired by Nature; Paper: Kiwi Kiss, Basic Black, Glossy White, Muirfield DSP; Ink: Black StazOn, Kiwi Kiss, Pacific Point, Baja Breeze, So Saffron; Accessories: circle punch, brayer

Monday, October 20, 2008

Last but not least!

Here is my last swap card. Isn't it gorgeous? It's not often that I'm as happy with a project as I am with this one.
I used my favorite new stamp set, Inspired by Nature. I stamped the grass image onto Always Artichoke with bleach. I was expecting to get a pale yellow, but I got a beautiful pale plum instead! On top of that, I stamped the flowers with Chocolate Chip craft ink and embossed it with clear EP. I kept the card simple because I wanted the image to be the star.
Supplies (all SU): Stamps: Inspired by Nature; Paper: Pale Plum, Always Artichoke, Chocolate Chip; Ink: Chocolate Chip craft; Accessories: bleach, ticket corner punch, key tag punch, clear EP, Chocolate Chip narrow grosgrain ribbon, Rich Regals brads
Happy stamping!