Saturday, March 15, 2008

Third Day Rocks Duluth!

Last night, I saw a fantastic show! Headliners Third Day with new band Revive, DecembeRadio and Sanctus Real. One of the things I love about Third Day is the way they turn a concert into a worship service. (Of course there are many other things to love! LOL) They encourage everyone to dance and sing along. Also, I found out that holding up your cell phone has replaced waving cigarette lighters. Welcome to the new millennium!
As an aside, I always get homesick for Georgia listening to Mac Powell talk. The band is from Atlanta just like I am!
When Mac was introducing all of the band members, he said, "There are 3 defining moments in history: the discovery of fire, the invention of the submarine, and the musical styling of Dr. Mark Lee!" That just cracked me up! I would add a fourth: Stampin' Up!

This is a band from Australia called Revive. They opened for Third Day in Australia, and the band invited them to come to America. So they live in Atlanta now, too! They were very friendly. I got high fives when I told them I'm from Atlanta. And the lead singer invited the whole audience to stay at his mum's house if/when we visit Down Under!
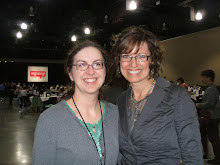
This is my friend and downline, Rhonda, with the lead singer of DecembeRadio, Josh. We saw them last summer at Higher Ground too. They are a great, hard-rocking band! Josh shook our hands and introduced himself to us, and the whole band signed Rhonda's CD. They were just as friendly at Higher Ground.
Sanctus Real is one of Daniel's favorite bands. He hasn't seen them in concert yet, and he had to work last night. He was so bummed! I bought him their new CD last night and got the lead singer's autograph. When I told him about Daniel, he said, "Tell him I said hi and that we missed having him here." Isn't that sweet?

I'll have the Saturday challenge up later today. I've gotta get stamping first!

Thursday, March 13, 2008

Fun Workshop!

Here are the projects we made at the workshop tonight. We did the votive holder similar to the one I posted before. We made a tag punch envelope pouch. These are awesome and so easy! I used the tutorial by Amanda Collins. Inside the pouch, there are peppermint patties with scallop circle punches attached. The card we made was one I got from Stampers Showcase. I added a brad and ribbon slide from the new Hodgepodge Hardware.
Here's Pauline doing some wheeling. It was her first good wheel experience, and she also had her first rub-on success! Whoohoo!
Deb and her mom, Louise, are always so much fun! Louise was our hostess.
Louise's cat loved my purse! He was digging in it and laying on it.
Tomorrow night, I am going to an awesome concert: Sanctus Real, DecembeRadio and Third Day!
Saturday, I will post a challenge for you. If you have any suggestions, let me know! Happy stamping!

Monday, March 10, 2008

Weekend Sketch Challenge card


Here's the card I made for Beate's Weekend Sketch Challenge. I needed a baby card this week, a rarity for me! One of my co-workers had a baby boy. I decided to use the Cutie Pie paper for the background; I used the white gel pen to add fake stitching. I don't have many baby stamps, so that choice was easy. I love this set from last year's spring mini; it's one of the few I kept that isn't current. Since I use the stampin' spots, it's easy to ink just one line at a time. I debated between using buttons or build-a-brads, but I thought the buttons would add more color. The rub-ons were so easy to put onto the buttons; just adhere the buttons first. The rub-ons even went right over the holes!

Supplies (all SU): Stamps: That's Nice; Paper: Shimmery White, Bashful Blue, Certainly Celery, Rose Red, So Saffron, Cutie Pie DSP; Ink: Bashful Blue, Certainly Celery, Rose Red, So Saffron; Accessories: white gel pen, cutter kit, blue gingham ribbon, Soft Subtles buttons, Love & Happiness rub-ons, double hole punch

Saturday, March 8, 2008

Saturday Challenge # 6

This week, the challenge is a little different. Find a card that you've made that you really like, and make the card again but totally change ONLY the color combo.

On the far left is a card that I made at the end of October at my up-up-upline, Sandi's. It's so pretty! The color combo is Naturals Ivory, Blue Bayou and Close to Cocoa. One day, I looked at the card and suddenly thought that I'd love to make it at a workshop, but I don't have the Blue Bayou ribbon. I started thinking about the ribbon that I have. Thanks to my NEW downline, Rhonda, I have a nice long piece of the Pomegranate ribbon, and Purely Pomegranate and Basic Gray is one of my favorite color combos! I thought Shimmery White would make it really elegant.
So I made the card, but the Pomegranate seemed a little too much. (That's the middle card.) I tried again, using Basic Gray for the sponging. It turned out great! Even though the card is the same, it has a much different look just because of the change in color. I was thinking this card would also look great using some of the other stamps in Priceless, especially the heart!
Happy stamping!

Wednesday, March 5, 2008

Sour cream container


Remember when you'd get a baked potato in a restaurant and they'd bring you a cute little triangular container of sour cream? Well, that's what this is based on! Isn't it adorable? It would be a great party favor. It could hold candy or even $50 gold pieces as Carol Duvall always says. It's very easy to make and doesn't even use a lot of materials. You can find Beate's fabulous tutorial here, but I'll tell you how I made mine too.
Beate's tutorial calls for 1/4 sheet of cardstock. I used a 4 X 6 piece of designer paper so I could get 6 from one 12 X 12 sheet. I used sticky strip to close it into a tube. Then I used sticky strip again to close each end and used the crimper 2 turns on each one. To get the authentic sour cream container look, the sealed ends should be turned 90 degrees from each other.
I like Beate's tip on putting the sticky strip on before closing up the tube, although it was not too hard to apply the sticky strip afterwards. She also has a pretty acetate one at the end of the tutorial.
It would be very easy to make a lot of these!
Supplies (all SU):
Stamps: Priceless, So Many Scallops; Paper: Whisper White, So Saffron, Rose Red, Cutie Pie; Ink: Bashful Blue, Wild Wasabi, white craft; Accessories: crimper, retired ribbon, scallop circle punch, 1 1/4 & 1 3/8 circle punches

Monday, March 3, 2008

Still using the accessories, baby!

This is the card I made for Beate's weekend sketch challenge. I'm continuing my "no more hoarding" theme for 2008. This card uses chipboard, glitter, ribbon, embossing powder, patterned paper and hardware! The bird on the chipboard is embossed in white and then I sponged the chipboard with Cameo Coral craft ink. My recommendation is to let the craft ink dry naturally and then use a baby wipe to carefully wipe the ink off the embossed image. You can always go back and fill in with more craft ink around the edges of the image as needed. (I tried drying the ink with the heat gun, and it set the ink on the embossing too.) I used the corner rounder punch to make the scalloped edges.
What's the most accessories you've ever used on one card?
Supplies (all SU): Stamps: Always; Paper: Whisper White, Cameo Coral, Chocolate Chip, So Saffron, Tempting Turquoise, So Saffron Prints; Ink: Versamark, Cameo Coral (classic and craft), Chocolate Chip, So Saffron; Accessories: white EP, On Board Accents, heat & stick powder, fine Cosmo glitter, corner rounder punch, chocolate chip polytwill ribbon, Styled Silver hodgepodge hardware

Saturday, March 1, 2008

Saturday Challenge # 5

This week's challenge is to use a stamp set that you haven't used in 2008. Bonus points if you combine it with another challenge. Here I've combined it with the no more hoarding challenge. I've used 3, count 'em, 3 brads, and one is a rhinestone brad. Shocking! I've also used some brand new ribbon, and my white gel pen.
I created this card for the Limited Supplies Challenge on SCS. This week's challenge seemed so hard that I just wanted to see if I could do it. Here's what you can use: One flower stamp and any embellishments. NO background stamps, NO decorative paper, and NO rub-ons except sentiments. Yikes!
I got the color combo from Julie's blog, Paper Pleasing Ideas. Last week, her color combo was Bordering Blue, Wild Wasabi and Pumpkin Pie. I went through a bunch of saved card ideas on my computer until I found a layout that I thought would work; it was a card from Stampin' Up. Then I looked through my stamp sets to see which ones have been gathering dust. (There's more than I would care to admit!) I decided to use Bud Basics. Normally, I would use the coordinating jumbo wheel and then use the solid stamps to fill it in. But I thought the large outline stamp would make a good focal image as well as a good background. I stamped it in bleach on Wild Wasabi cardstock to create the background piece. (Different colors of cardstock will have different colors where you bleach depending on what the base color of cardstock is.)
For the focal image, I stamped on white cardstock using Pumpkin Pie ink. Then I used my aquapainter to pull some of the color from the outline to color in the petals. I'd never tried this before, and I was really pleased with the result!
Since I'm not hoarding my accessories any longer, I put a rhinestone brad in the center of the flower. The blue brads and the ribbon were part of the original card layout I CASEd. I added paper piercing and wrote the word "friend" with the white gel pen.
Supplies (all SU): Stamps: Bud Basics; Paper: Whisper White, Bordering Blue, Pumpkin Pie, Wild Wasabi; Ink: Pumpkin Pie; Accessories: bleach, aquapainter, Ice Circles rhinestone brads, Fresh Favorites brads, white gel pen, Pumpkin Pie striped grosgrain ribbon, crafters tool kit
Tip: Whenever you see a card or technique you like, do you print it out? Do you have a HUGE stack of these? I used to do this. Now I save paper by saving the documents to my computer instead. I copy the image onto a blank document and also copy a link of where I found it so I can give credit. I've got folders on my computer for sketches and techniques. Then whenever I want, I can just look through the documents on my computer. When I want to use a particular one, I can either print it out or just leave it up on my screen to look at.