Saturday, May 3, 2008

Saturday Challenge # 13--Patterned paper

This week's challenge is to use patterned paper. Patterned paper is another thing I tend to hoard. Since "No more hoarding" is this year's theme, let's use it up!
This project is based on something that Jaron showed us at Regional. He used CDs to make decorative letters that he hung on a metal bar. I loved the idea but didn't want anything that elaborate, so I decided to make a little bulletin board of sorts. I used a junk CD that I got in the mail. First, I traced the CD onto the patterned paper (Almost Amethyst of course!) and cut out the circle just inside the line. I coated the label side of the CD with ModPodge and laid it onto the paper circle. I turned the CD over and made sure the paper was smooth with no bubbles. Then I just let it sit for a while to dry. (When Jaron made his, he used Crystal Effects for the adhesive.) After it was dry, I used a sanding block to smooth down the edges of the paper. (It left a white rim of paper, but I like that look. I could have kept sanding to remove all of it.) I punched a hole in the CD with my Cropadile then I punched part of a hole a couple more times around the edge of the first hole. (The reason for this is that the jumbo eyelets are slightly larger than the hole the CAD punches.) Then I used the CAD to set my eyelet. I added some Elegant Eggplant ribbon and tied a piece of Basic Gray taffeta around it. It seemed a little plain so I popped in a rhinestone brad. I took a medium binder clip and adhered a coordinating piece of paper with glue stick. I used Crystal Effects to adhere the clip to the CD. ( i put CE along the bottom edge of the clip as well as along the top of metal piece for maximum adhesion.)
If you play along, please link your project here. Use ISC13 as a keyword if uploading to the SCS gallery. Thanks to those who made beautiful ribbon cards last week!
Tip of the Day: When setting a jumbo eyelet, press the handles together twice. The first time rolls up the flange; the second time rolls it up a little more so it looks and fits much nicer.
Happy stamping!

Wednesday, April 30, 2008

Projects from Regionals


These are 2 of the projects that we made at Regionals. Both use Live Your Dream from the Occasions Mini. I love that both of these projects used the line stamp too. The second one is a pocket card. It's made from an envelope with one end cut off. I just love it! I didn't even know SU had kraft envelopes. How dorky am I???
Tip of the day: To make it easier to remove the backing from a Stampin' Dimensional, poke your fingernail into it. You can see in this photo how that pops one edge loose. This tip came from Jaron Winder with Stampin' Up. Boy, does that little thing make a big difference!
Happy stamping!

Monday, April 28, 2008

New Catty Sneak Peek


These two photos are display boards for a new set from the upcoming Fall/Winter Collection. The set is called Party Hearty, and it's a super cute birthday set.
Here are a few updates from the world of Stampin' Up. First of all, Stampin' Up started accepting credit cards from customers on April 23. That made lots of demonstrators very happy. Also, the Occasions Mini ordering period was extended to June 30, so here is an updated timeline for you:
June 30: last day to order from Occasions Mini
July 1: Retiring list released
Aug 10: last day to order from Spring/Summer Collection
Aug 11: 1st day to order from Fall/Winter Collection
No word on a retiring accessories list so far.
May special (for National Scrapbooking Month): Order $35 in merchandise and then get 25% off all On Board chipboard. Also, order a cutting mat and get a hobby blade free.
Happy stamping!

Saturday, April 26, 2008

Saturday Challenge # 12--Ribbon!

This week's challenge is to use ribbon! I have lots of ribbon, and I tend to hoard it, just like everything else. On this card I have used 3 different kinds of ribbon.
I was inspired by Kristina Werner who posted a video tutorial for ribbon weaving. See that video here. I'll try to make a photo tutorial this week for those who can't/won't watch video online.
Last night, we had our monthly craft night at church, and I actually got a lot done for once. I worked on some of the make and takes from Regionals that I hadn't finished. I made a Mother's Day gift for my mom (super cute AND in her favorite color), but of course, I can't show you that until after Mother's Day. I did this ribbon weaving piece. I made a little clipboard from a CD for my desk at work, and I made a double pocket card. That's probably the most I have EVER gotten done. I usually forget something that I need that stops me in my tracks. Last night, I didn't have anything in particular that HAD to get done, and I had several things to work on. Plus, I always love hanging out with Rhonda and Pauline. And Rhonda gave me the pink taffeta ribbon that I used on the card. Thanks, Rhonda!
The color combo for the card is from SCS this week: Chocolate Chip, Certainly Celery and Pretty in Pink. I started with the celery ribbon, which is from Fairy Tales Ribbon Originals. I adhered (or adhesed, as Jaron would say!) it to a Chocolate Chip mat. The card base is Pretty in Pink. I stamped the Sanded background onto it multiple times in different directions and then sponged pink around the edges. I used Sticky Strip to adhere, adhese the Chocolate Chip twill ribbon to the pink taffeta. I used the horizontal slot punch to notch the edge of the card for the ribbon to go through. I cut a separate piece of pink taffeta to make the knot, and I added a ribbon slide to the knot. The rub-on is from the retired SAB set. (I tried rub-ons on the celery ribbon, but it was too textured for the rub-on to stick.) I took 3 small flowers from the Pretties Kit and removed them from their stems. (They just slide off.) I smooshed them onto my PIP spot, spread the color with an aquapainter, and heat set them to dry. I put them back on the stems and stuck the stems down into the ribbon seams. I used mini glue dots stacked on top of each other to adhere the flowers to the ribbon.
Supplies (all SU): Stamps: Sanded; Paper: Certainly Celery, Chocolate Chip, Pretty in Pink; Ink: Pretty in Pink; Accessories: Fairy Tale Ribbon Originals, Chocolate Chip polytwill ribbon, Pretty in Pink taffeta ribbon, Love & Happiness rub-ons, Pretties kit, Styled Silver Hodgepodge Hardware, horizontal slot punch
Give my ribbon challenge a try and post a link to your card here. Use ISC12 as a keyword if you post to SCS.
Happy stamping!

P.S. I think I should explain the whole adhesed thing. Jaron Winder said at Regionals that he thinks we should say "adhese" instead of "adhere" because we are using adhesive. He said that he told Shelli Gardner that, and Shelli told him he should find another job... He is hilarious!

Thursday, April 24, 2008

More from Milwaukee

One of my favorite things about Regional is all of the display boards that they have. I really like that I get to see TONS of projects to get ideas from. They always have a board just for the set that you receive. This is the board for So Much. I think this set is really versatile!
Here is a display board for Live Your Dream from the Occasions Mini. Three of the projects we made used this set. I love it! I'm having a huge debate with myself over whether or not to get this with one of my SAB free sets I earned. (Feel free to give me your opinion: Should I go ahead and get Live Your Dream or wait to see if I like something better from the Preview?)
Tip of the day: Heat set whenever you use craft ink! When I was working on my second swap card, I was covering quite a few stars with craft ink. I always heat set anything that I use craft ink on, and the photo above shows why. The top half of the star has been heat set; the bottom half has not. Heat setting dries the ink on the surface of your project instead of allowing the ink to settle down into it. This means that the color is truer when you heat set. This is especially true of the Soft Subtles for some reason, but as you can see above, it works for any color.
Happy stamping!


Tuesday, April 22, 2008

Had a blast in Milwaukee!

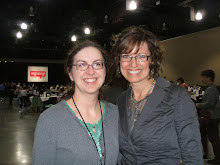
Milwaukee was awesome! It took Rhonda and me about 7 hours to drive there. We stopped a couple of times along the way, and it rained most of the time. Our hotel, the Hyatt Regency, was very swank, and there was a skywalk connecting it to the convention center. We drove down on Friday. After we arrived, we ordered pizza and garlic cheese bread from a local pizza place. No dieting on this trip! LOL Here we are working hard. (I'm on the left, and Rhonda's on the right, in case you don't know us!) We saw our up-up-upline Sandi and our sideline Lori too. We sat with some really nice ladies from Illinois. The woman who sat next to me knows who I am from SCS and my blog, so now I'm famous! LOL Her SCS name is triplef; I can't remember her real name! Triplef, if you send me your address, I'll RAK you.
We did some great projects. Three of them used Live Your Dream from the Occasions Mini, which I don't have yet. It's a SU conspiracy to get me to buy it! I really like the free set we got. It's called So Much. I wouldn't have bought it before, but I think I will use it a lot.
I swapped 25 of the faux silk card, which only took about 10 minutes! The other 2 cards were for SCS swaps. We did those at lunch. It was so fun to meet some of the other SCSers in person. I met newdemo, s1itcher46, michellewilliams, and GWTW Junkie. I know there were others, but it was all a blur after a while! Kim (s1itcher46) made our nametags, and she has hosted several swaps that I have been in. I gave GWTW Junkie a Scarlett O'Hara button that I had brought along. We GWTW fans have to stick together!

Shelli Gardner wasn't there, but I did get to have my picture taken with Jaron Winder and Lori Olaveson. If you've ever been to an SU event, you know that Jaron is hilarious! I met Lori Olaveson at her first SU regional in Atlanta back in March of 2005. She remembered meeting my mom and me; how cool is that?
I took tons of pictures of the display boards. And all of the projects that we saw demonstrated were awesome! Since there was only one regional instead of the usual two, we had 4 workshop wows from demonstrators. I'm already planning things to try, and hopefully I'll get them done this week!
Saturday night, we had an SCS dinner at John Hawk's pub. Traciac was kind enough to organize it, and JustmeinIN was there along with Mary Ann (I can't remember her SCS name). On Sunday, we drove back in beautiful weather. We stopped for lunch in Eau Claire, and it was 60 degrees! We ate at Fazoli's (YUM!), and again, no dieting on this trip! It was cold and cloudy when we got back to Duluth, though.
Keep checking back for more photos, and hopefully, I'll have some things of my own to show.
Happy stamping!

Sunday, April 20, 2008

Milwaukee Swap # 3

Here is my last swap for Milwaukee. I meant to post it on Friday before I left, but I just ran out of time. I totally LOVE how this came out. It's based on a card I made a long time ago using the Pretties kit. I didn't have enough flowers from that for the swap, so I changed it to 3 flowers using the five petal flower punch. It was so simple to make yet looks like it's more. I used the bone folder to shape the leaves and the flower petals.
Regarding my swap # 2, I took Lorien's suggestion and changed the top to just red cardstock, and I just tied a knot in the ribbon and wrapped it around the back. It looked much better after that.
Look for photos from Milwaukee as well as comments from me regarding what a fabulous time Rhonda and I had. I'll be posting as the week goes on. Gotta go finish unpacking and get some laundry done!
Supplies (all SU): Stamps: Priceless, Fundamental Phrases; Paper: Bashful Blue, Certainly Celery, Regal Rose, Cutie Pie DSP; Ink: Bashful Blue, Rose Red; Accessories: Fairy Tale Ribbon Originals, Pretties kit, Ice Circles brads, Rich Regals brads, ticket corner punch, word window punch, five petal flower punch, bone folder
Happy stamping!