Showing posts with label 3-D. Show all posts

Sunday, October 16, 2011

Quick and easy stocking stuffer

One of this month's Creative Crew challenges is to create a holiday decoration or gift.  Mine is so quick and easy!  It's a little tin that holds 2 chocolate nuggets. 
The tin is an Altoids Smalls tin.  The tin is already red, so that saves a lot of work!  I traced the tin lid onto Holly Berry Bouquet DSP.  I chose the glittery red striped sheet, and I put the pattern on an angle because it reminded me of a candy cane that way.
The nuggets are wrapped with adhesive address labels (Avery 8160).  I sponged 2 of them with red ink.  I stamped them with the verry merry image from It's a Wrap Holidays in VersaMark.  I embossed them with Pewter EP.  I stamped the same image onto red cardstock and embossed it to create the sentiment on the tin.
Happy stamping!
Jana Signature

Wednesday, September 7, 2011

Sour cream container

If you're of  a "certain age," you may recall a time when you ordered a baked potato and sour cream came in these little rectangular containers.  These were all the rage a few years ago, and I decided to demonstrate them again this month.  The container shown above started life as a 4 X 6 piece of Paisley Petals DSP, but it would be easy to change the size of the container by changing the size of the DSP.  I chose 4 X 6 because you can get SIX from one sheet of DSP!  If you'd like to know how to make the sour cream container, keep reading!
First, choose which side of the DSP you want to show on the outside.  Put a piece of sticky strip along the short edge of the side you want to show.  Pull off the red liner and adhere the other short edge, forming a tube.  Second, flatten one end of the tube.  Seal it with sticky strip.  Third, flatten the other end of the tube at a 90-degree angle to the first end.  **Don't seal it until after you fill it with goodies!  (Carol Duvall would say to use $50 gold pieces, LOL!)  Believe it or not, this container holds 8 Starburst.  Fourth, seal the second end after filling the container.  Fifth, crimp both ends.  Two clicks of the crimper handle does the trick.  Optional:  Add an adorable tag using Pretty Postage and the postage and extra-large tag punches.
Happy stamping!
Jana Signature

Friday, March 25, 2011

Decor Elements chalkboard

Here is the chalkboard/magnet board I made using the Decor Elements chalkboard that I got FREE during SAB. The chalkboard piece is 8 X 16. You apply it much like contact paper. The Notes and swirl are separate so you don't have to use them at all or you can use just one part. You can apply it to a wall or cabinet or just about any semi-smooth surface. I decided that I wanted to have mine be a magnet board too, so I got a 12 X 24 sheet of metal at Home Depot for about $8. I applied the chalkboard then attached the ribbon with Crystal Effects to give it a little pizzazz. Yes, that's Pear Pizzazz and Concord Crush, LOL! I've made 2 magnets so far out of buttons and glimmer brads with magnets stuck on the back.
Happy stamping!
Jana Signature

Wednesday, March 9, 2011

Owl punch rose

One of this month's Creative Crew challenges was to recycle something. I turned an Altoids container into a gift card holder. This also continues my personal quest to use all of my Jolly Holiday DSP! You can find the tutorial for the owl punch rose on Valita's blog here.
Here's a better view of the container. The ribbon is vanilla grosgrain.
Happy stamping!

Jana Signature

Monday, March 7, 2011

Picture frame for Alyssa

My friend Alyssa was the maid of honor at my wedding. I wanted her to have a photo to remember the day, so I covered a frame that I got at the Target Dollar Spot. (I bought several when they had them for Father's Day a few years ago.) I used Lap of Luxury DSP to coordinate with the colors we were wearing. I used Pretty in Pink taffeta ribbon to create a forkbow. I added pearls and rhinestones to the ribbon on the opposite side.
Happy stamping!

Jana Signature

Wednesday, February 2, 2011

Origami napkin ring

One of the Creative Crew challenges for February is to create items for a dinner party. I came up with the idea for a napkin ring using an origami flower called kusudama. I first saw this flower on a gorgeous wedding cake that Jodie Olver made. She is one this year's Artisan Award winners. I found the link to directions on her blog.
I'm trying to use my Jolly Holiday DSP for non-Christmas projects (don't want to waste it!), so that's what I used. When I glued the flower together, I inserted a loop of ribbon to run the longer ribbon through to tie around the napkin.

Here's a side view where you can see the ribbon loop.
Here's a close-up of the flower. I added a big pearl to the center to cover up the gap where the 5 petals came together.
Happy stamping!

Jana Signature

Thursday, October 7, 2010

Box in a Bag

 Last night, I had a workshop at Louise's house.  Deb and Pauline were there too, and we had so much fun!  I'm disappointed that I forgot my camera so you could see us.  We used Dazzling Diamonds on the Christmas card we made, and we all looked like fairy princesses!  Even the cats sparkled!
The other project we made was the Box in a Bag.  This was very popular a while back, but I never made one before now.
Here is the inside of the bag.  It has a little box made from cardstock as the base so that it is sturdy.  The base is 3" square, and the bag is 5 1/2" tall.
It's also economical!  You can get 2 of these from a sheet of cardstock and a sheet of DSP! (I used Garden Green cardstock and retired DSP from last year's Holiday Mini.)  The piece of DSP is 5 1/2" X 11".  The box is made with a 4 1/2" square of cardstock.  So cut a sheet of cardstock the long way at 4 1/2"--you'll have a 4 1/2" X 11" piece and a 4" X 11" piece.  Then cut 2 4 1/2" squares from one piece.  Take the 4" piece and cut off 2 1" X 11" strips for the decorative borders at the bottom.  That leaves you with enough scrap cardstock to punch out the tab punches to run your ribbon through.
To make the box base, score all 4 sides at 1" then score diagonally from each corner to make little pleats that fold in.  (Click on the link in the first paragraph for a great tutorial on Splitcoaststampers!)
Happy stamping!
Jana Signature

Friday, February 12, 2010

I'm going to be on TV!

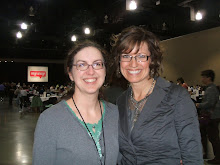
On Wednesday, I taped a segment for a cooking show at our local PBS station. A few times a year, they ask viewers to submit recipes for a cookbook. The one I submitted for is "B is for Beef." To my amazement, they called and asked if I would come in to cook on TV! They create a show with some of the recipes that they show during pledge drives. If you live in northeast Minnesota, the show will air on WDSE (8.1 and 31.1) on Saturday March 6 and Sunday March 21 at noon (both days). Here I am with Juli Kellner, the host, after we were done taping. I got to keep the apron, and they will send me a copy of the cookbook too.
Here are the last of my Valentine candy boxes. Two of them are for men, so I used the reverse side of the glittery paper. The box on the upper left is smaller because I have a smaller box of candy in there; it's Jelly Belly jelly beans. It's really just the front and back that are smaller; just decide how tall you want the box to be, add that size again for the back and add 3/4" for the width at the top.
Happy stamping!
Jana Signature

Monday, January 25, 2010

Valentine treat box

Tonight, I'm having a workshop. I'm excited not only because I love getting together with my friends but also because my downline, Rhonda, is coming. One thing I miss as a demonstrator is going to a workshop and just stamping for fun, so I'm glad that Rhonda will be able to do that tonight.
My workshop is focusing on using DSP. I have been trying not to hoard my accessories, especially DSP, so we are using DSP on every project. You've already seen 2 of the projects on my blog. The third project is a treat box I found on Andrea Walford's blog. She has a PDF for making the box. The finished box is 3 1/4 X 5 1/2. I found several things in the Valentine candy section that will fit in the box: Hershey's marshmallow heart, Reese's peanut butter heart, Sweetart conversation hearts, Jelly Belly valentine mix, and Fun Dip. These were not in the bagged candy section but were near the boxes of valentines with treats included. (The regular conversation hearts might also fit, but I didn't check because I don't like them.) The box seems a bit tall to me, and it would be easy to change just the height of the box since the front, top and back is one separate piece of cardstock. This would actually make the project easier as well since Andrea's box requires 12X12 cardstock for that part; making the box shorter would enable you to use 8 1/2 X 11.
I added the piece of ribbon around the box to hold it closed. The ribbon is adhered to the back of the box with just a dab of adhesive. The flap slides under the ribbon very easily, so the ribbon doesn't have to be untied.
The embellishment is a 1" circle punched from Sending Love DSP layered onto a 1 1/4" Pretty in Pink circle and a Chocolate Chip textured scallop circle.
The sentiment is stamped onto a 3/4" X 2 1/2" strip of Very Vanilla cardstock. I used the 1 1/4" square punch to make the V in the end.

Here is the inside of the box. The marshmallow heart is about the same height as the Fun Dip, so you could still make the box a bit shorter with these items. The Jelly Belly box is shorter, just a little taller than the box front.
Supplies (all SU): Stamps: Teeny Tiny Wishes; Paper: Very Vanilla, Real Red (regular and textured), Pretty in Pink, Chocolate Chip textured, Sending Love DSP; Ink: Real Red; Accessories: Chocolate Chip satin ribbon, circle punches (1", 1 1/4", scallop), 1 1/4" square punch
Happy stamping!

Jana Signature

Wednesday, December 23, 2009

One last Christmas ornament

I made one more Christmas ornament this year. The chipboard is retired. I inked it in Ruby Red craft ink then embossed with Irridescent Ice EP. The DSP is a gold sheet from Christmas Cocoa. It has a slight shimmer.
Happy stamping and Merry Christmas!
Jana Signature

Wednesday, December 9, 2009

Christmas ornament

For this week's workshop wow challenge, we are making Christmas ornaments with bonus points for using chipboard. I think chipboard is a natural material to use for ornaments because it has enough weight to hang nicely. The only current chipboard I have is Timeless Type, so I decided to make mine a monogram.
I saw this ornament made by Shelli Gardner herself on an episode of Paper Paint and Crafts this past weekend. She had a chipboard star on the front of hers. The back piece is a 4" circle of Real Red textured cardstock. The pleated circle is made from Christmas Cocoa DSP. It's a little hard to see in the photo, but the paper has a bit of shimmer to it. To make this piece, I cut two 1 1/2" strips of the paper and scored them every 3/8". I fan folded them and adhered the 2 pieces together. Then you turn it so it lays flat and push it together. You have to hold it together to get it to stick to the base. I put 3 pieces of Sticky Strip on the red circle to hold it in place.
The chipboard is covered with Handsome Hunter craft ink and embossed with Irridescent Ice EP. I also used Sticky Strip to adhere the letter to the pleated circle. Now all I need to do is punch a small hole and add some gold cord to hang it.
Sorry for the sporadic posting! Life is very hectic these days plus I've been working on my mom's Christmas present which I can't show you yet because she reads my blog. (Hey Mama!) I'll try to get it posted for Monday as she'll have her gift by then. I also just got my SAB and Occasions Mini preorder today. Hopefully I can stamp a quick project to post for Friday. I'll do my best!
Happy stamping!

Jana Signature

Monday, November 9, 2009

Card holder

Isn't this card holder adorable? It looks like a magazine holder and holds standard-sized cards. I have 4 cards in this one, and it can definitely hold more if I want. I saw this on someone's blog and found the original tutorial here. She has great photos, measurements and directions.
It's made from 2 pieces of cardstock. Here's what it looks like without the ribbon covering the seams. (Note that I did not follow the original directions correctly. The diagonal line should end where the bottom piece starts, but I don't think it makes a huge difference in the end.)
Happy stamping!

Monday, October 5, 2009

WICKED Haiku box

This month's WICKED stamper is the fabulous Lyssa Zwolanek. Like me, she is a big Gone with the Wind fan, and I got to meet her in April 2008 in Milwaukee.
One of her WICKED projects is her Haiku box. She named it after one of the designer papers SU used to offer. Her box is 3X3, and you can find her directions on her blog. I've also put her directions into a PDF document that you can download.
I'm not a 3X3 fan, so I modified her box to hold standard-sized cards. My finished box is 5X6. For my box, you need a 10X12 piece of cardstock. Along the 10" side, score at 1", 2", 8" and 9". Along the 12" side, score at 2", 3", 8" and 9". Cut the box and put it together just like Lyssa's. (Her photos are excellent!) The one negative to my box is that the flap doesn't quite meet the bottom edge of the box, so I added a scallop edge to hide that. My piece of ribbon is 21" long. The DSP on the flap is 1 3/4" X 5 3/4", and the scallop piece was 1 1/2" X 6" before I scalloped the edge.
Happy stamping!

Wednesday, September 9, 2009

Card box

This project is a box to hold cards or other goodies. The pattern was created by my fellow SU demo, Susie Nelson. She got the dimensions and pattern from a box of cards from a certain humongous card retailer that shall remain nameless. :) Here's the inside of the box. For the front, I used my last little scrap of retired skull and crossbones DSP. I knew it would be perfect with the Beware Pirates stamp set. Of course, using the DSP meant I had to use my last piece of Kiwi Kiss textured cardstock. I miss that DSP and Kiwi Kiss too!
Happy stamping!

Wednesday, July 29, 2009

Another 3-D Card

Here is another 3-D card. We'll be making this at my next workshop. For this card, I used one piece of cardstock for the inside. I started with a piece of Naturals Ivory 3 3/4 X 7 1/2. I stamped the horse in Soft Suede. I started at the right then just kept stamping off to the left to show movement. Then I stamped a horse on another piece of cardstock, cut it out and adhered it with dimensionals. For the background, I used JanTInk's moonlighting technique. I punched a 1 1/4" circle from a Post-It note. I used the hole in the post-it as a stencil to sponge the sun in So Saffron. Then I used the punched piece to mask that circle. I added color in the following order: More Mustard, Pumpkin Pie, Really Rust and Close to Cocoa. Then I scored the cardstock at 3 3/4 and adhered it to the inside of the 3-D card. I put the adhesive on the Soft Suede piece--the left side and the top triangle of the scored side that folds in. That way, the inside piece will stay flat with no score line when the card is folded closed.
Happy stamping!

Friday, July 10, 2009

3-D Card

Every month, SU sends demonstrators a magazine called Stampin' Success. Last month, they featured a 3-D card. Here's my version. I used Inspired by Nature. The color combo is Crushed Curry, Melon Mambo, Bashful Blue and Old Olive.
The grass is stamped on the Bashful Blue, and the flowers are cut out and popped with dimensionals.

Here you can see how one of the blue panels is not fully attached to allow the card to fold flat.

Happy stamping!

Monday, June 15, 2009

Picture frame

I have several picture frames I got at the dollar spot at Target a couple of years ago. They hold a 4X6 photo. I used Mod Podge (matte finish) to adhere this Urban Oasis DSP to the frame. I cut out the center section in one piece, so I decided to use it as the photo mat. I love the way it carries the design in to the photo area. This is very easy to do and makes a great gift!
Happy stamping!

Wednesday, June 3, 2009

3-D Book Gift Card Holder

Last week's 3-D demo challenge was this adorable gift card holder that looks like a book. You can find the directions here.
I used my To the Nines specialty DSP to cover the chipboard for the book cover. I know Rhonda and Pauline will be so proud of me because I even used Sage Shadow to make the box on the inside. I don't know why, but I can't stand Sage Shadow! So I got this DSP to force myself to use it more.
The "title" on the book spine is a piece of Canvas Cuts with a Fashion District rub-on.

To go with the heart theme, I added some hearts punched from a coordinating piece of DSP with the Heart to Heart punch.

Happy stamping!

Wednesday, May 6, 2009

One last regional project

Can you believe that I still had one last project to show you from Regional? It's hard to tell from the photo, but this is a treat holder. A cello bag fits inside. I just adore this flower! It's cut out using the Big Shot and a little folder that both cuts and embosses at the same time. We used DSP and then the white part you see is the embossing that is SANDED to reveal the white core of the paper. GENIUS!
Happy stamping!