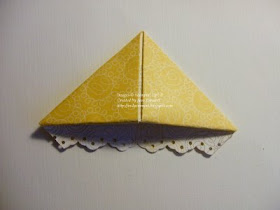
Here is a tutorial for the corner bookmark. It's a lot of photos, but I wanted to make sure each step is clear. I originally saw this on Dawn Griffith's blog. She has a video, and the link is in
this post. I added the eyelet border on the bottom.

Start with a 6" square of DSP. Decide which side you want to be the primary side showing and place that side facedown on the table.

Fold the bottom point up to the top point.

Turn the paper so the folded side is on the right. Fold the top and bottom points over to the left point to form a square.


Open those folds back up and turn the triangle so the long (folded) side is at the top. Fold the bottom point (top layer only) up to the top side of the triangle.

Fold the right point back down and tuck it under.

Repeat with the left point. You can stop at this point and have a great bookmark. Or you can move to the next step to add a little extra.

Place the bookmark into the paper cutter, pushing it so the folded edge rests against the blade arm. Cut off the excess paper.

It will look like this after you cut.

Unfold the bookmark and use the eyelet border punch on the cut edge.

Refold the bookmark.
Happy stamping!
 Start with a 6" square of DSP. Decide which side you want to be the primary side showing and place that side facedown on the table.
 Fold the bottom point up to the top point.
 Turn the paper so the folded side is on the right. Fold the top and bottom points over to the left point to form a square.
 Open those folds back up and turn the triangle so the long (folded) side is at the top. Fold the bottom point (top layer only) up to the top side of the triangle.


this rocks Jana, I am visual learner so I need to see the step by step instructions, esp with folding.
ReplyDelete